Long time I managed to write a blog entry. So I will start with something completely different than usual.
My father has introduced model railroads to us when we were young. He as well has kept the hobby up until now. And so have I. Yes – I am a nerd 😁 With autumn and winter often comes cold and rainy weather. While I do like facing all weather conditions it’s also a good time to spend time on projects inside. And apart from that I consider working on the models as very calming and even meditative. So around that time I turn my office at home into a railroad depot. And pick up on some general overhauls or improvements of the old models. This year I started two new projects.
Thalys PBA
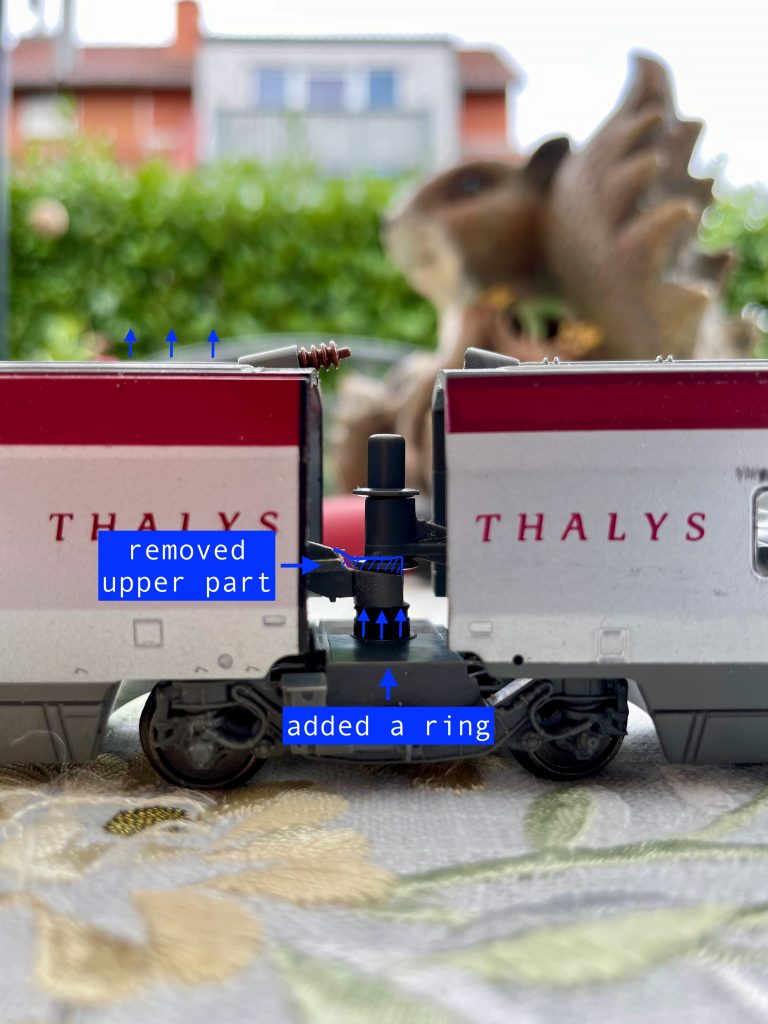
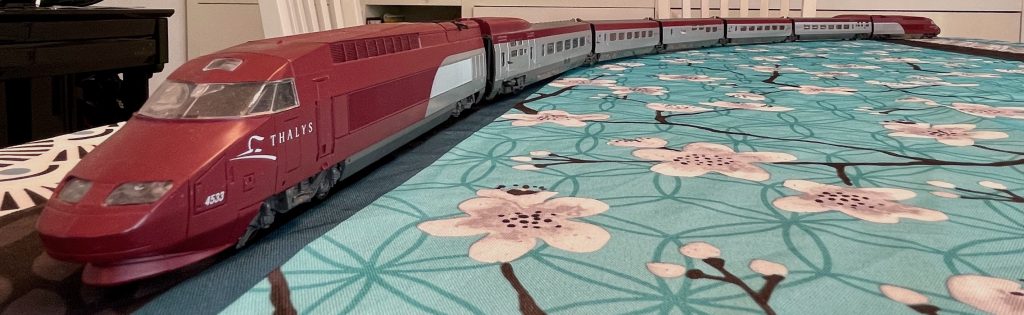
The first project was an old model of the Thalys PBA. Usually additional intermediate cars easily cost three times the price of the basic model. So when I found a set at a very decent price I bought it from eBay. I was well aware that I was in a bit of a risk of a mismatch. The base model with two engines and cars were originally from the manufacturer Jouef. The intermediate cars from Mehano. But from all my research Jouef never built intermediate cars for the 1990s version of the model.
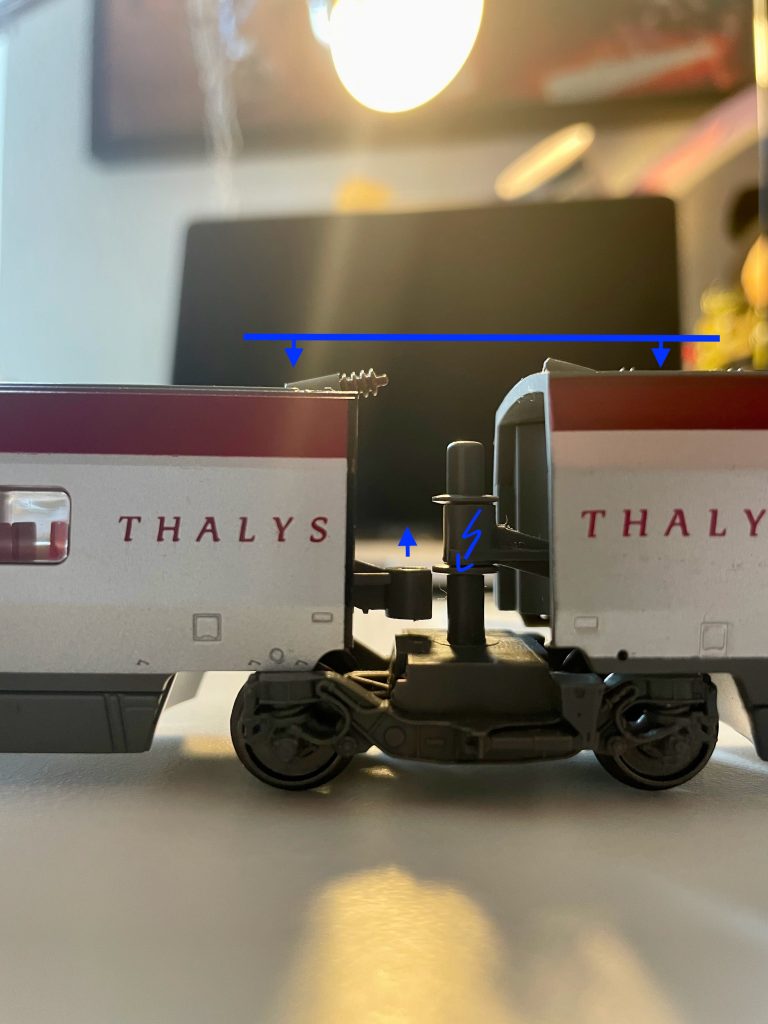
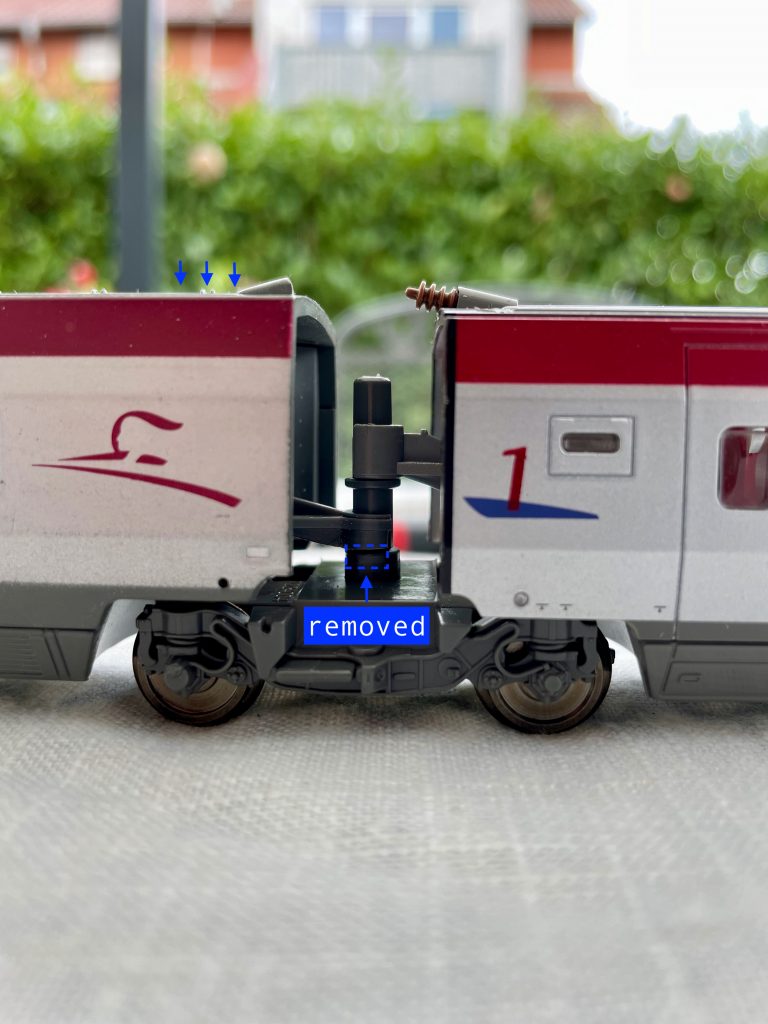
You can see the problem in the pictures below. The mechanism of connecting the cars is basically the same. The height at which this happens is not. So I had to make these two match to level the cars. You can see the two similar, yet slightly different jacobs bogies and my first little hack to help with the job.
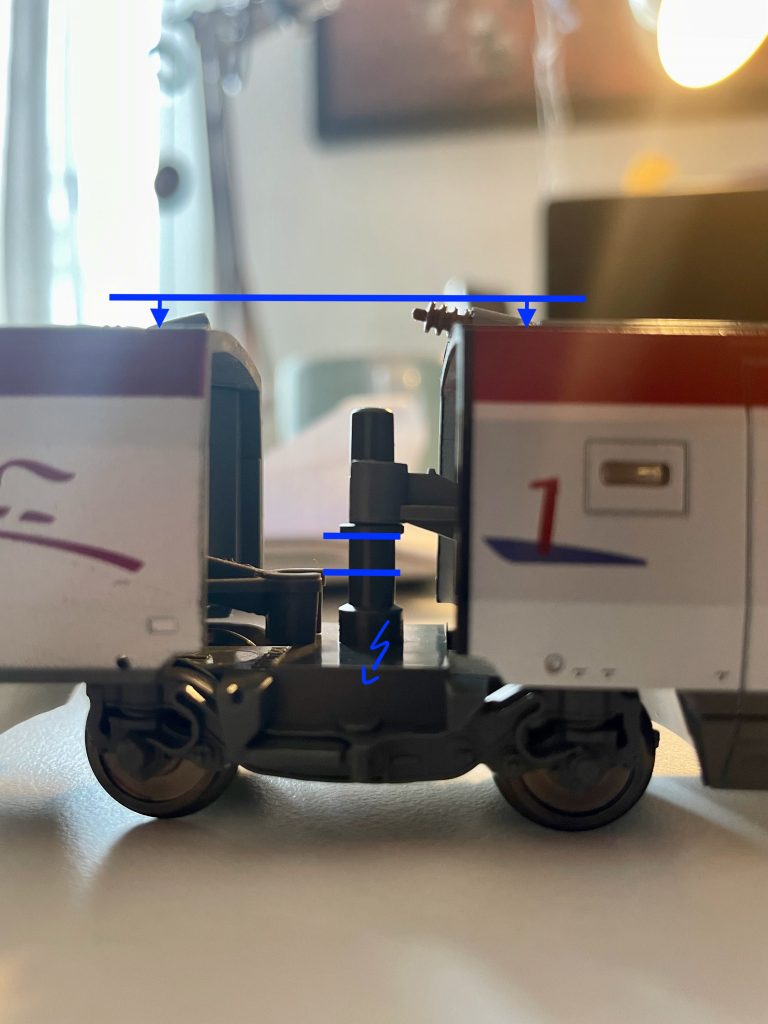
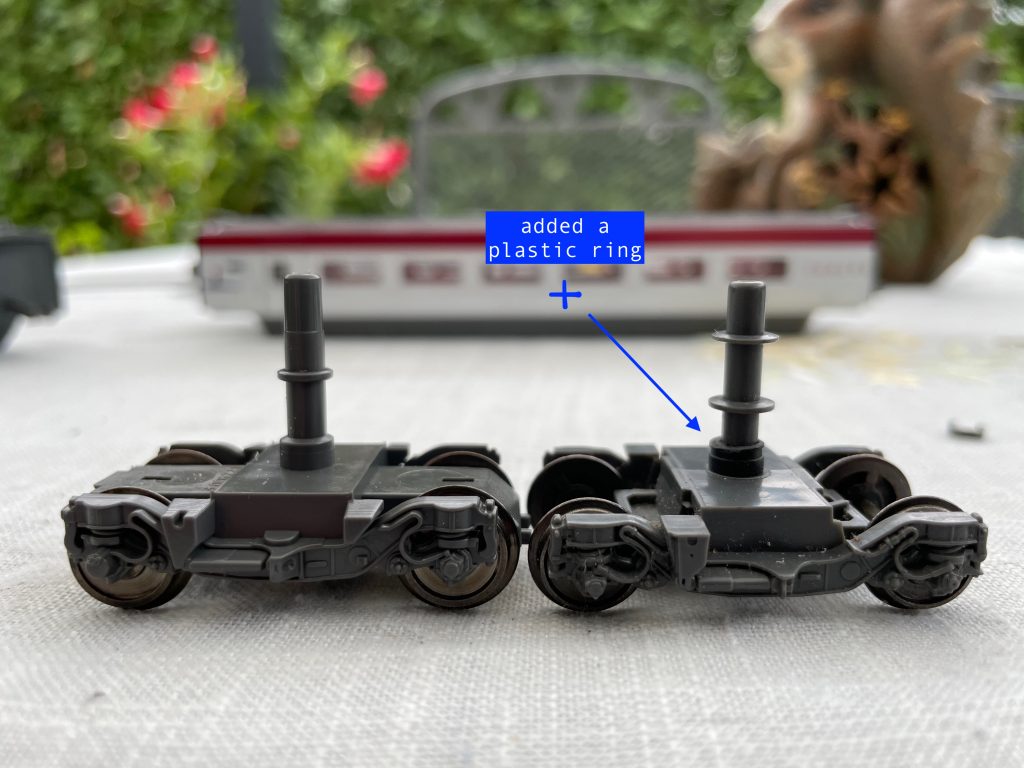
I did find some models for a 3D printer to solve this but that would take some more time and money. So I kept this idea as plan B and attempted a good old school plastic hacking approach. To be honest I do believe I need a 3D printer now. Damn 😂 But not this time.
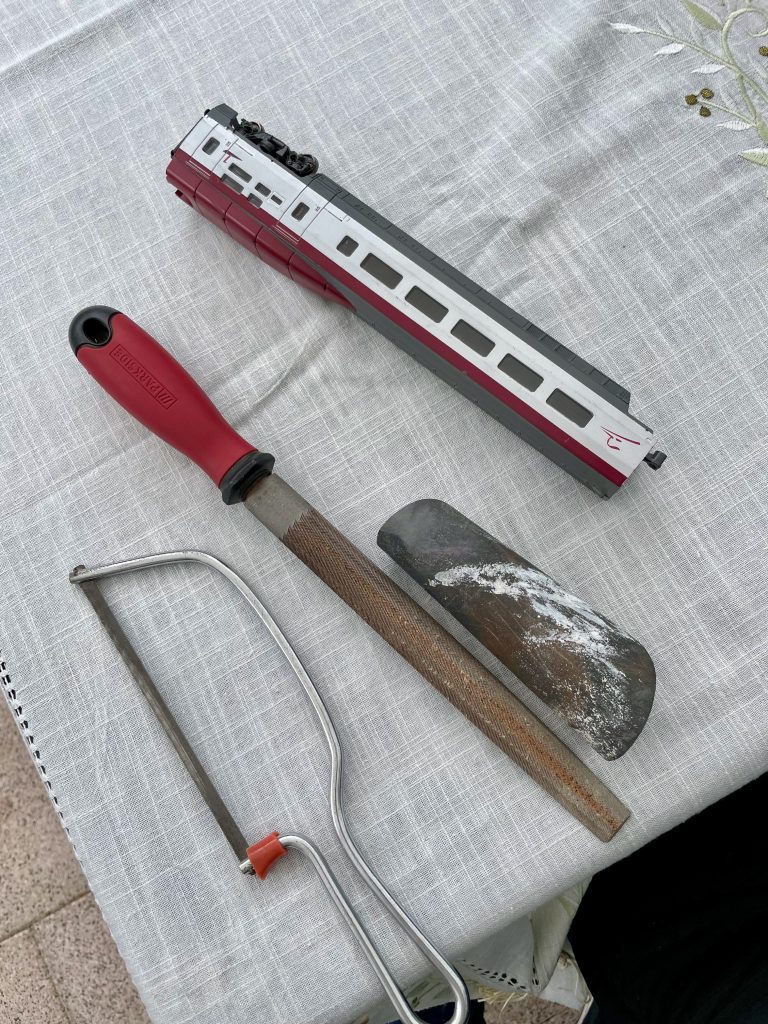
The left picture showing my hacking tools. The middle one how I increased the height for the left car. The last picture shows how I managed to decrease the height to level out both connected cars.
Maybe I will add some more tweaks to the model in the future. I could add lighting, the pantographs are not very detailed and the window of the locomotive is completely transparent. But for now the train finally has a decent length by adding the three intermediate cars.
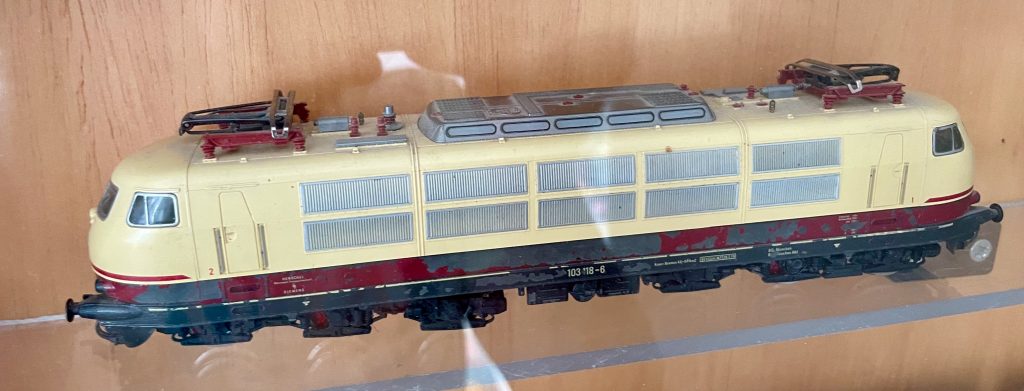
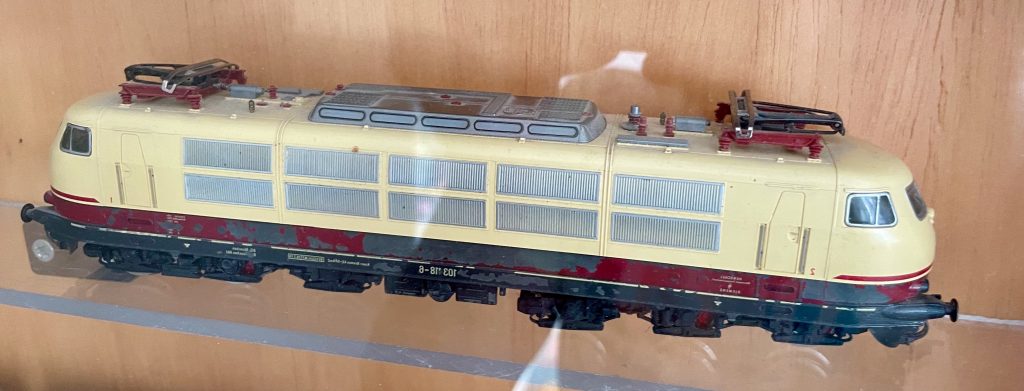
DB Class 103
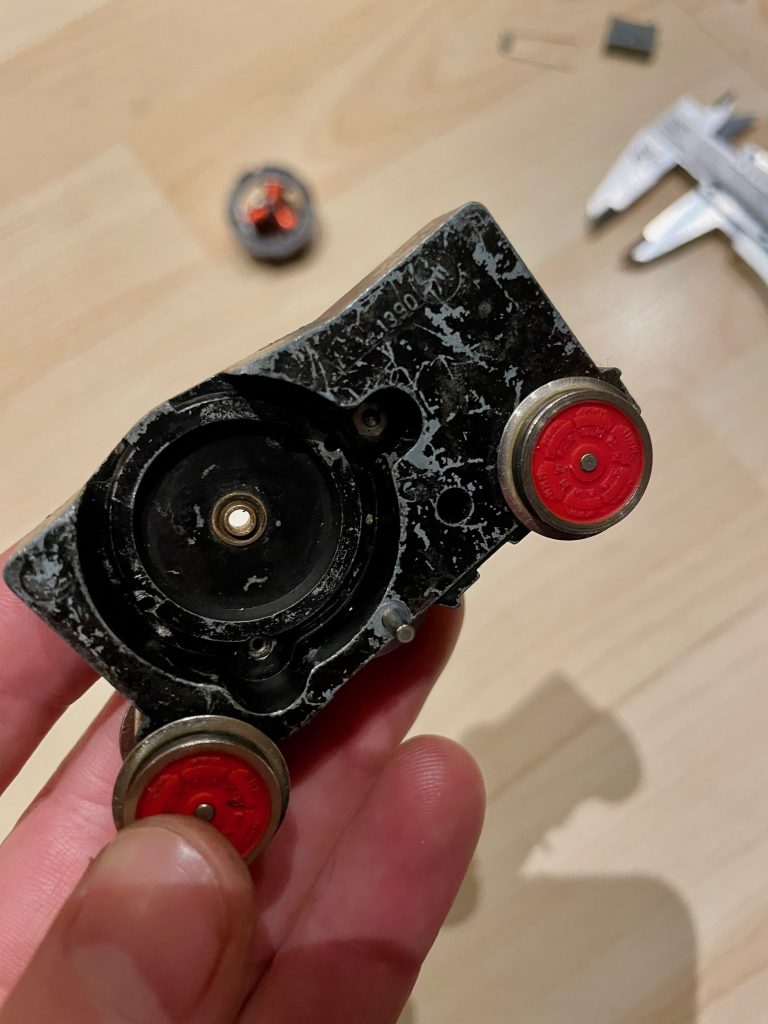
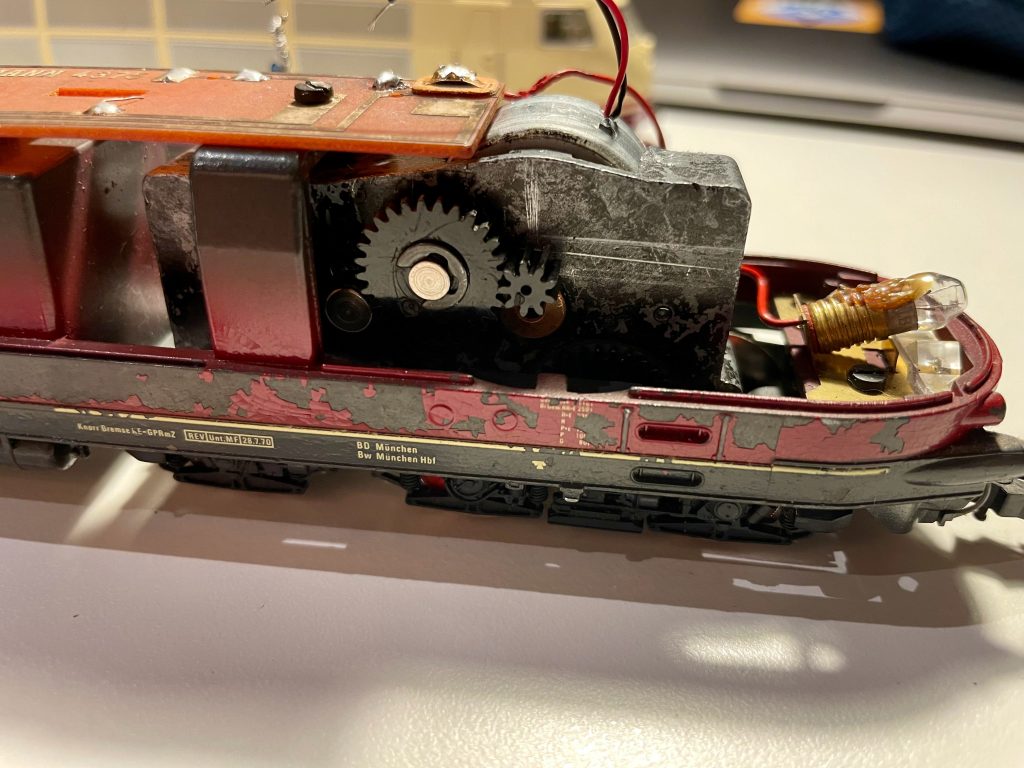
The second project this year was a DB class 103. Every year me and my family travel to my parents for Thanksgiving. A tradition brought to us by my mother from the US. My dad told me he needed some railroaders advice. So we sneaked out of the festivities. The problem he said, was that despite the headlights working the locomotive just wouldn’t move. First thought of us was that either something was wrong with the electrical circuitry or worst case the motor itself. A short check uncovered it was the motor. So I told my dad I would take it to this years railroad depot. Let’s see if I was somehow able to get the locomotive running again. As you can see it is an old model so buying original replacements at 120 € a motor was not a feasible option. And much less fun as well.
The motor of these models are brushed DC motors. Next I opened the motor and cleaned it. It had quite an amount of oil inside of it which was a bad sign. This can significantly decrease the conductivity and thus lead to further damage. From what I gathered on forums it leads to the motor producing more heat. And too much heat leads to more damage. And I guess that is what happened here. Even new brushes, a through cleaning of the contacts on the anchor only lead to short time improvements which deteriorated after minutes again. It just produced a lot of sparks, heat and the motor would eventually come to a halt with some smoke arising from it. So I gave up on the idea of using the original motor and removed everything.

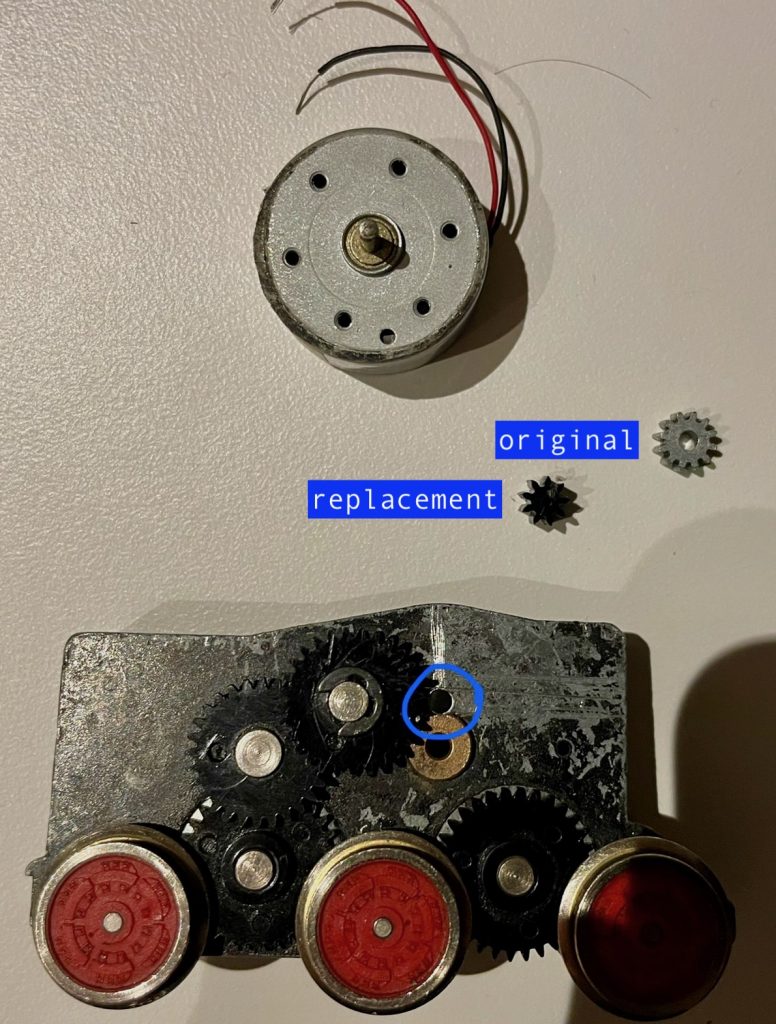
A dead cheap replacement for DC models are old DVD motors. Especially in this position where a small depth of the motor is crucial. I was quite surprised how well they work and how cheap they are. You can usually buy them from eBay for a few €. The model is called RF300. Note: I can’t vouch for long term usability of them yet. If you can’t reuse the cog from the original motor you can usually find good replacements as spare parts for slot cars. Buying them check for the axle width, size of the cogs and amount of teeth.
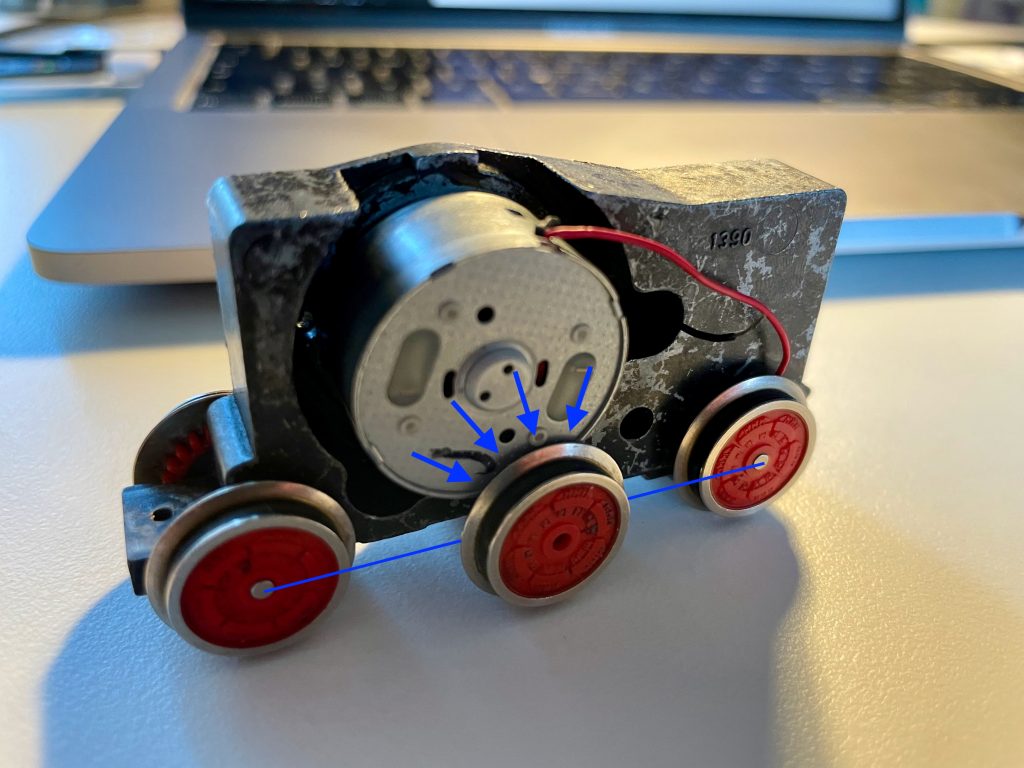
My first attempt was to use the original position which looked good in the first place. The axle was long enough to hold a cog on the other side. But as you can see in the next picture this meant I could not put the middle wheel on again. I took a very long time thinking about my options. Leave the wheel out. No – I would always see that. Searched for another motor with less depth. They were either not strong enough or even more expensive than purchasing the original parts. Then after I chattered about my “problem” to a colleague at the end of a meeting he came up with the solution! Eureka! He asked if it was possible to move the motor into a higher position.
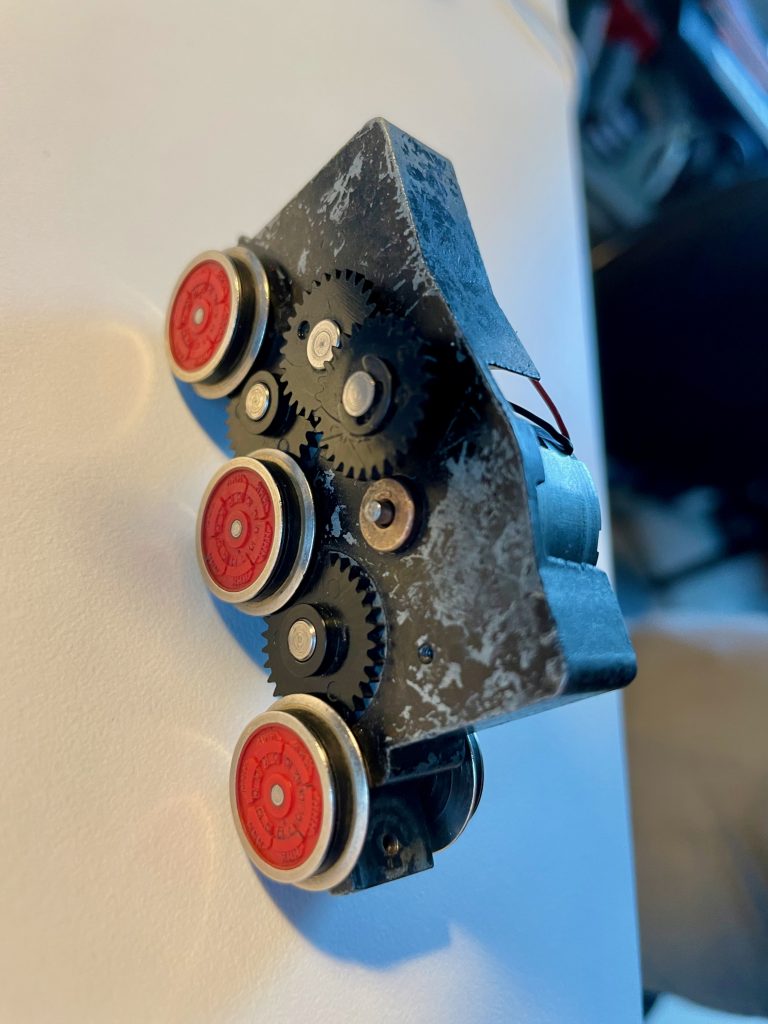

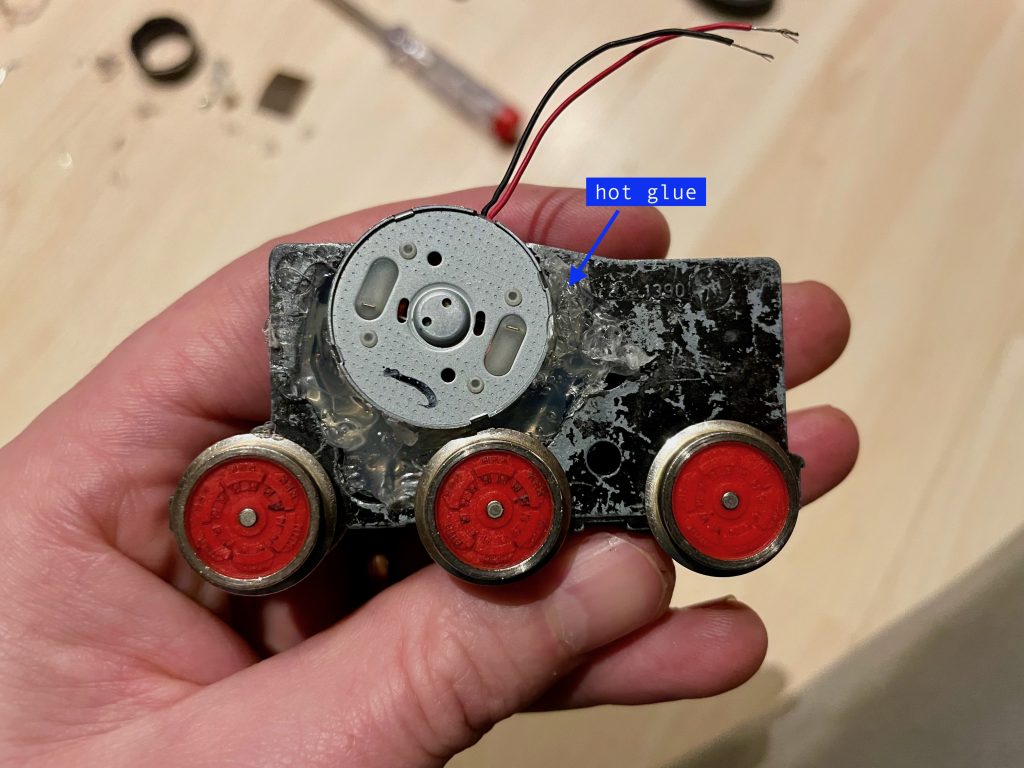
Before drilling the new hole I must have measured over and over again for about 30 minutes. Not getting this right might have fatal consequences for the project. What a relief when it turned out right. The new hole was closer to the next cog which meant a replacement was needed. Luckily I had the right size lying around in one of my boxes. After that I glued the motor in with hot glue. It doesn’t look too good but it’s easy to use. The biggest of all benefits is you can actually quite easily remove it again. In this case if the motor needs replacement this is still an achievable task.

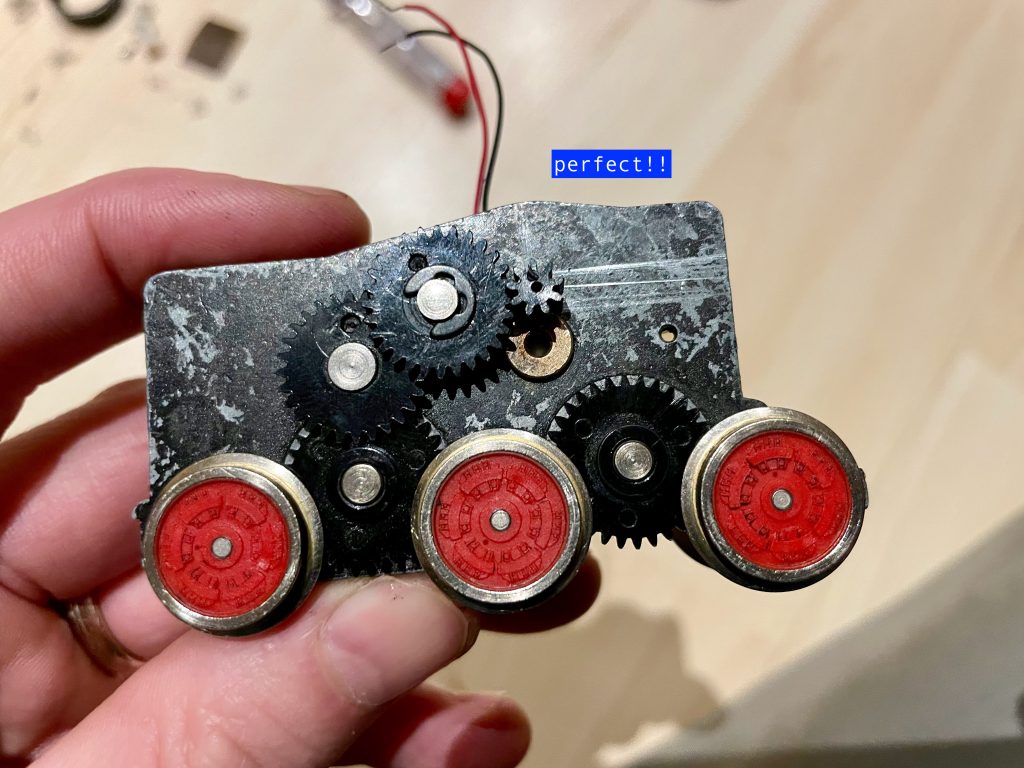
After all this was achieved I needed a first test outside of the locomotive. Both directions were running fine.
The sound was similar to the original. No unpleasant screeching sounds from motor or the gears.
The speed also seamed familiar and matched the model. Changing the gearing would have been an interesting challenge…
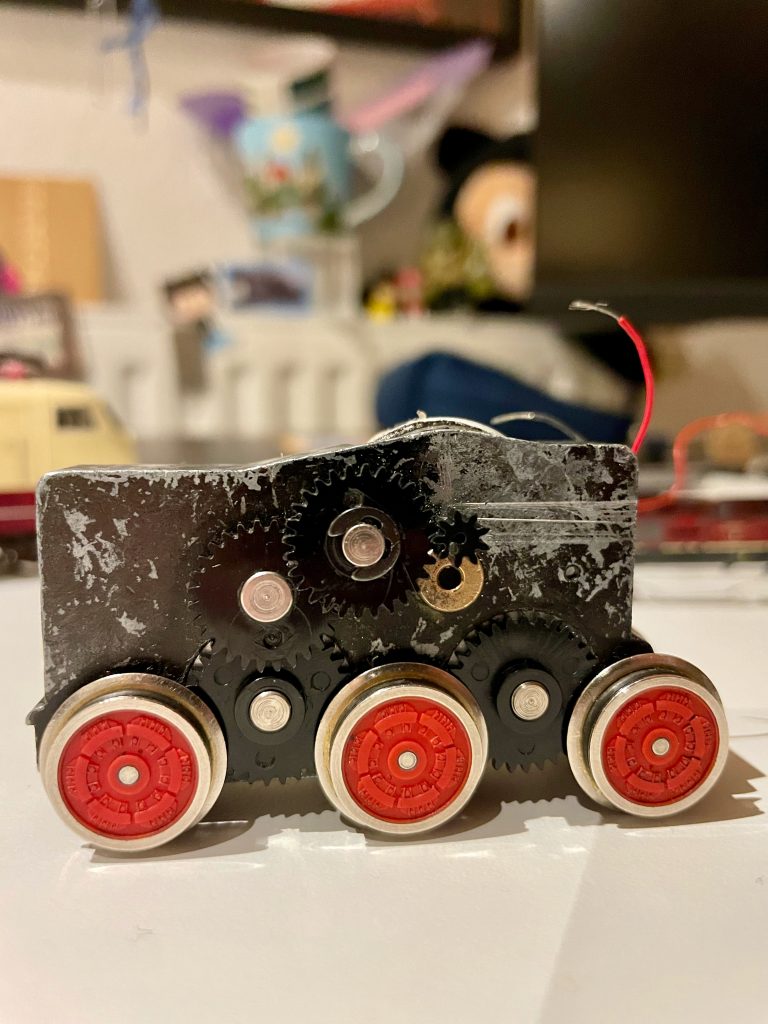
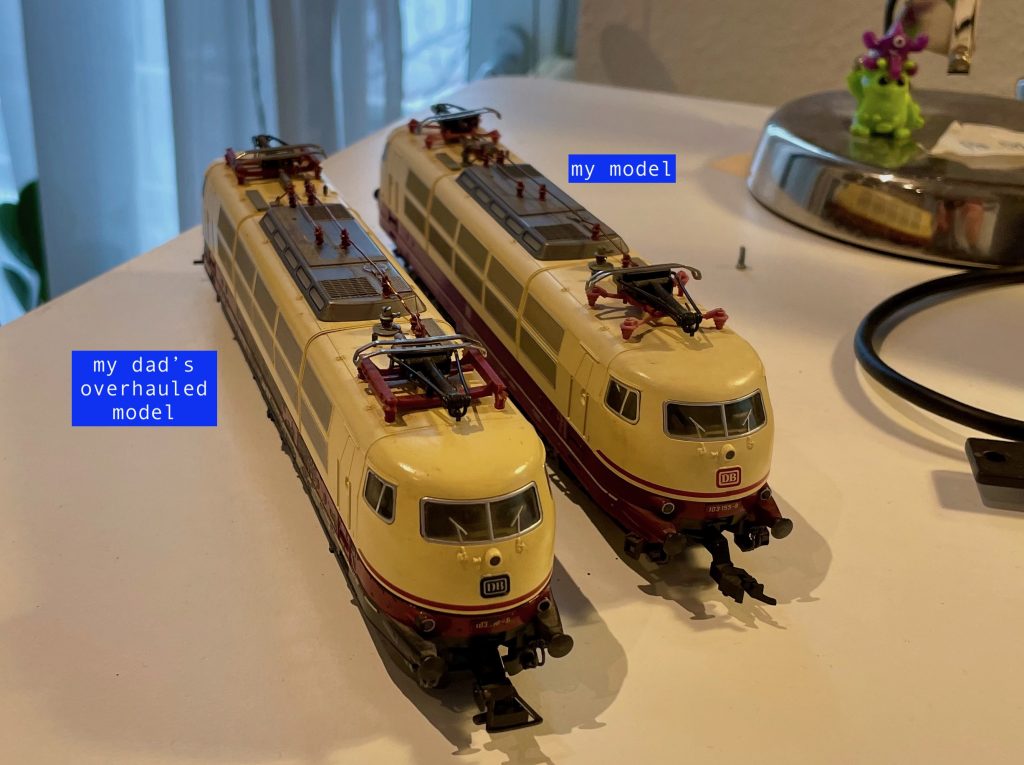
Now it was time to put the engine bogie back into the model. It turned out the motor was quite close to the circuit board. A thorough testing of maneuverability proved it to be no issue. You can see my model in the back. I got it out as a reference for when I redo the soldering properly at the end of the project.
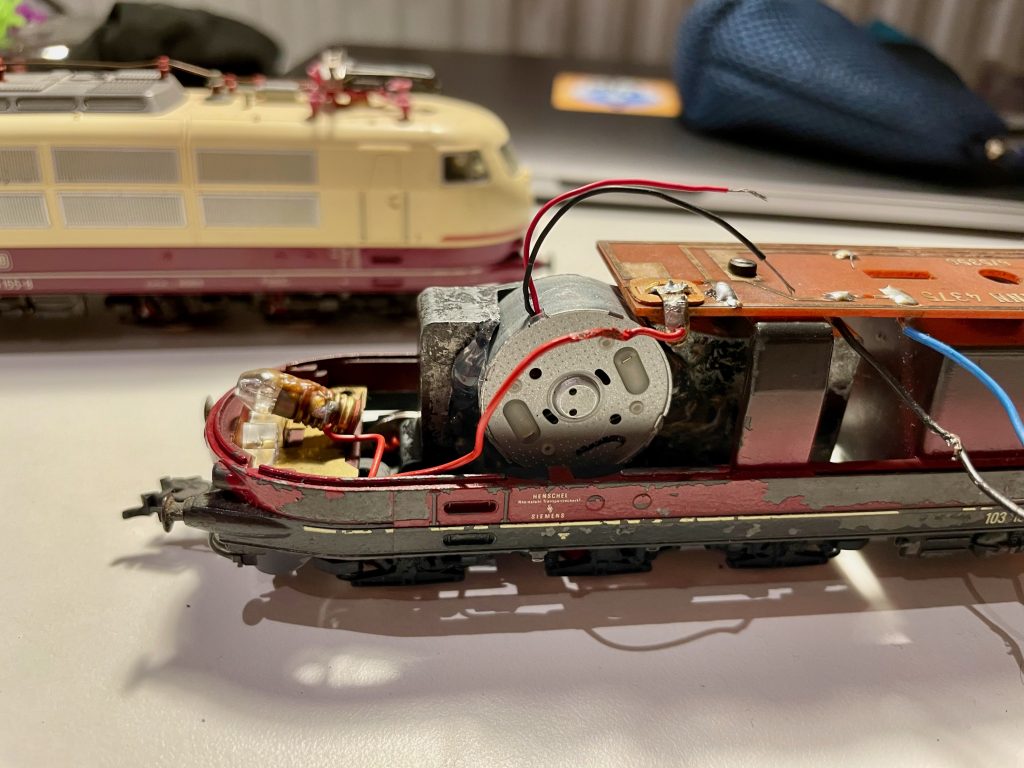
Now it was time to use some adhesive tape and a mini setup on the floor to check if it would run as expected.
Purring like a cat and running smoothly. Now it’s definitely worth adding some finishing touches before I hand it back to my dad.
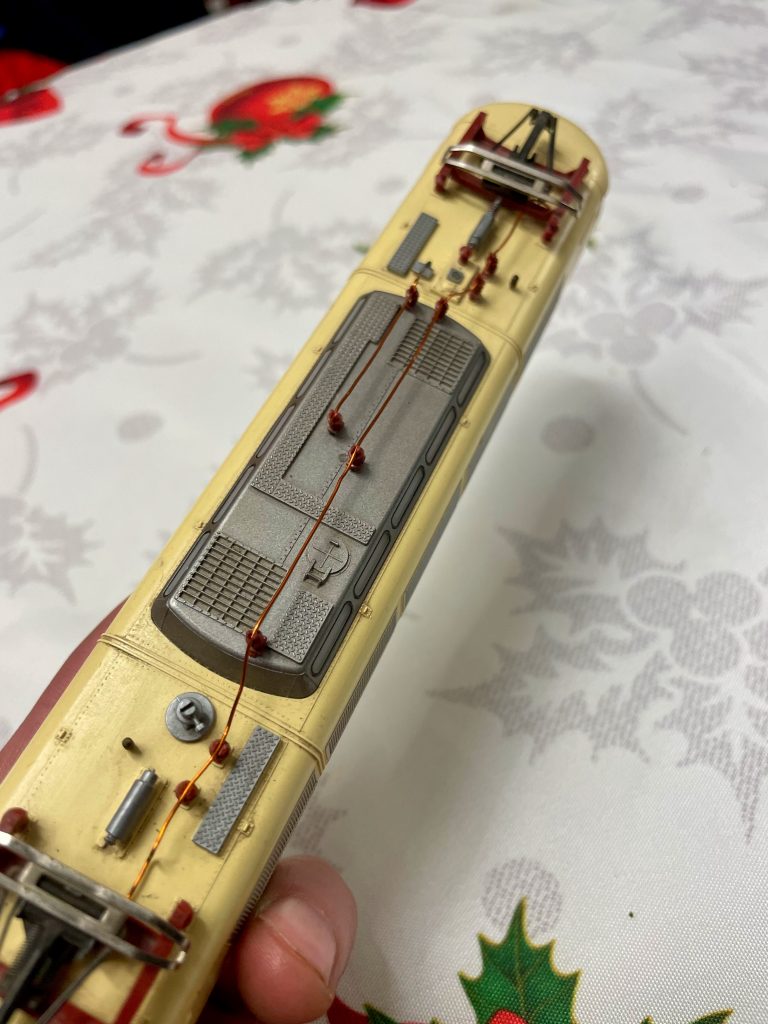
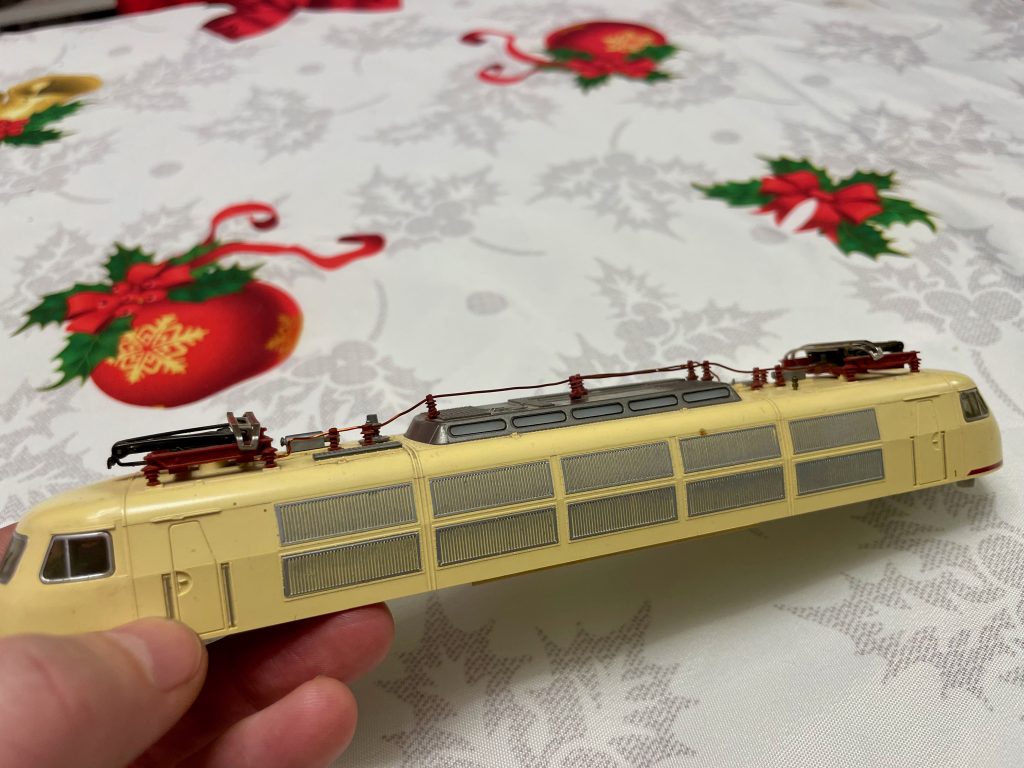
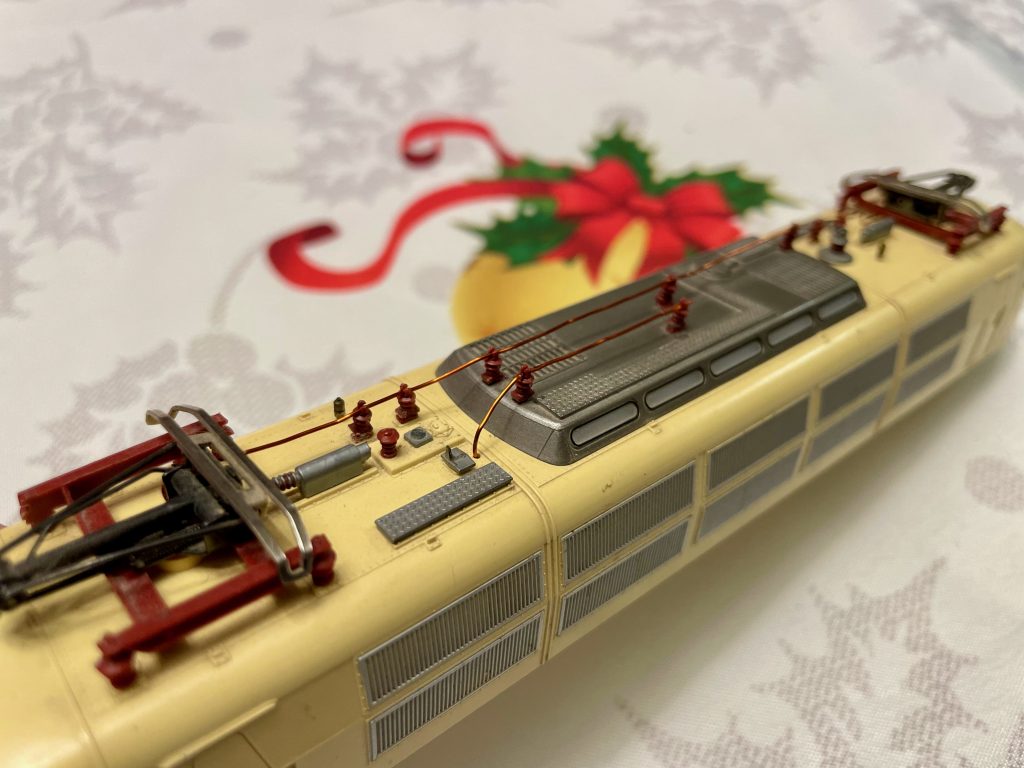
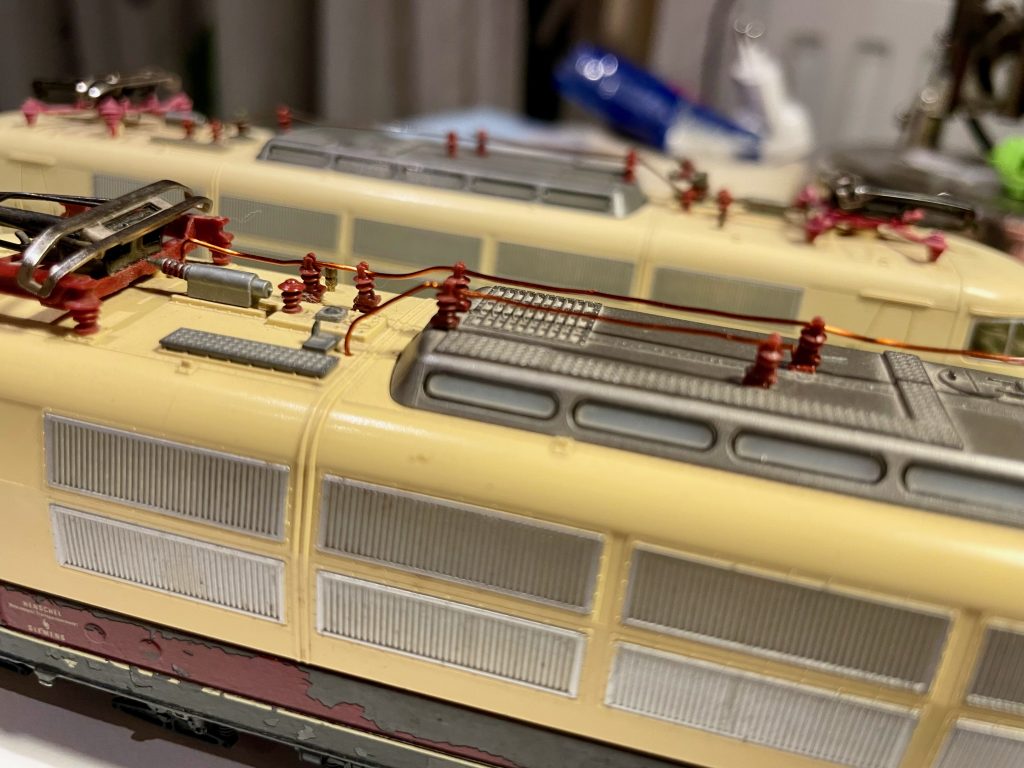
The old model was missing the wiring on the rooftop. I got some spare isolators and another colleague of mine came up with the idea to use the wire from an old coil. Usually old loud speakers used them a lot. Brilliant! I had some lying around and rebuilt the details on the roof to my best possible means. First I glued on the isolators and after that bent the wire carefully mimicking the original setup.
As i started the story I will conclude it. Working on these models is both fun and calming. Others maybe use yoga or reading books to stress out. I love working and repairing these old models. It’s a whole nice world of many little problems that require creative ideas to overcome. And a model is never finished. I have endless ideas to improve each one of them. It’s fun wiring new circuits for them like changing the head lights according to direction. I have done a few of those with changing red and white depending on direction for other models. Or using some electrolytic capacitors to get rid of flickering lights in passenger cars.
In these two projects I had even more fun by getting the help of my colleagues to nudge my problem solving in the right direction. And what I love most is that I can do what is the worst of all habits without any regrets: Starting too many projects at the same time and not bothering about finishing at all 😄
Stay safe, stay happy and a HAPPY NEW YEAR!!